|
|
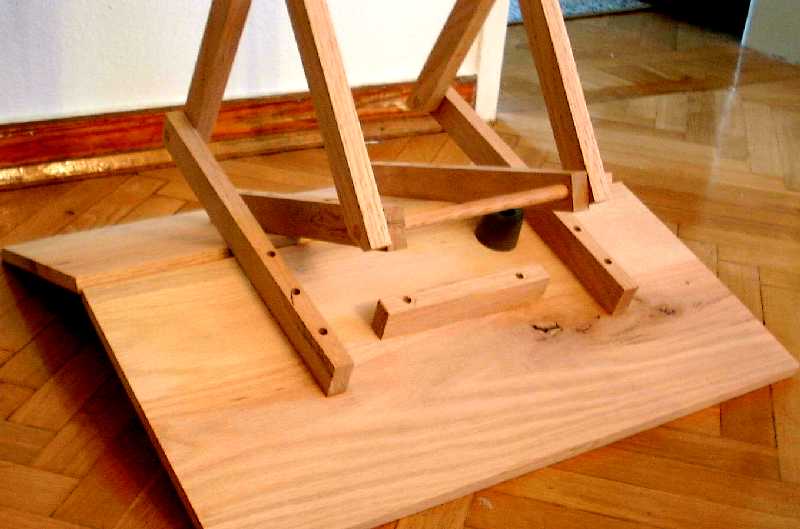
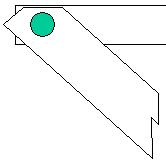
The unfinished, unstained table. |
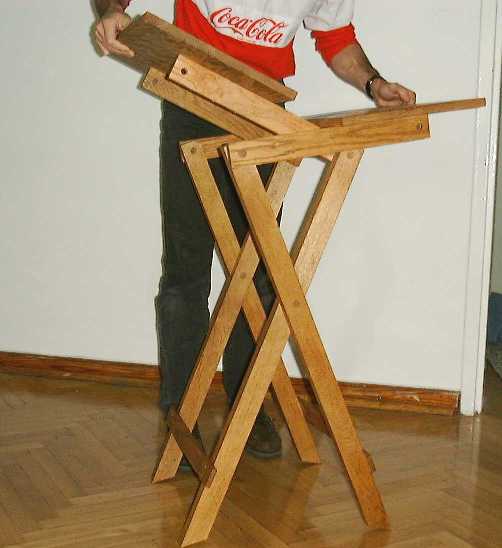
Setting the table up shows how it goes together. |
|
|
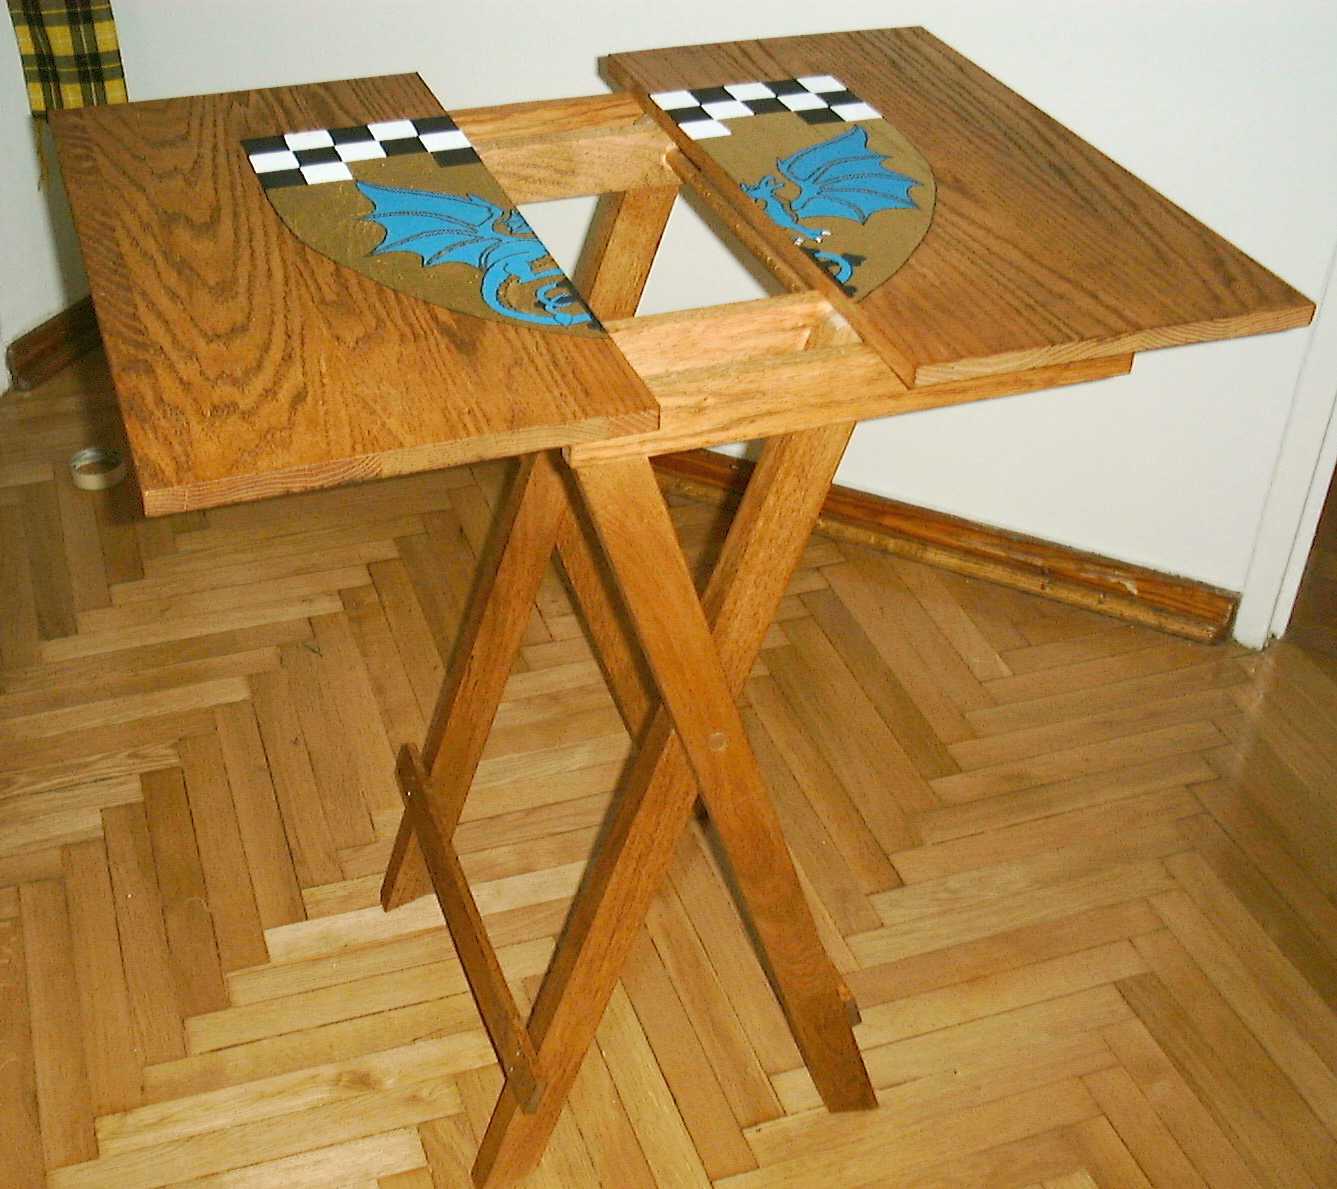
| The table, spread apart showing the table top rests. | The finished table shown folded with handle up. |
 |
 |
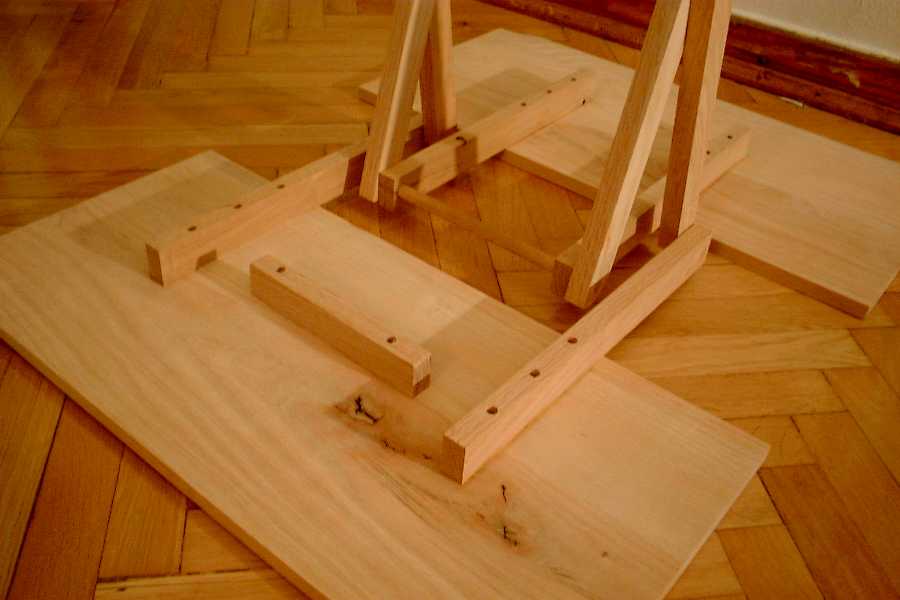
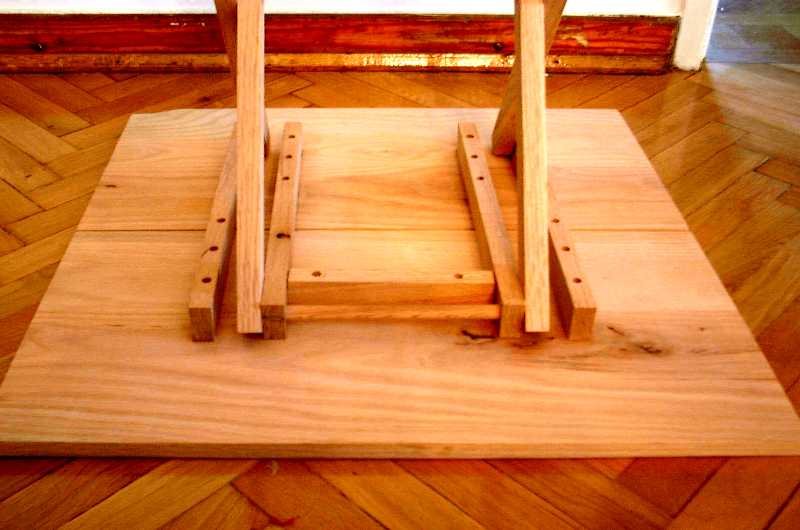
| The table upside down, showing the table rest
rails and the support bracket that locks the rails in place. |
Another photo of the bottom, showing the rails, and how the long wooden dowel that is the pivot between the rails and the legs on one side, also doubles as the handle. |
 |
|
| The table ready for set up, showing how the inner rails are locked against the support bracket |
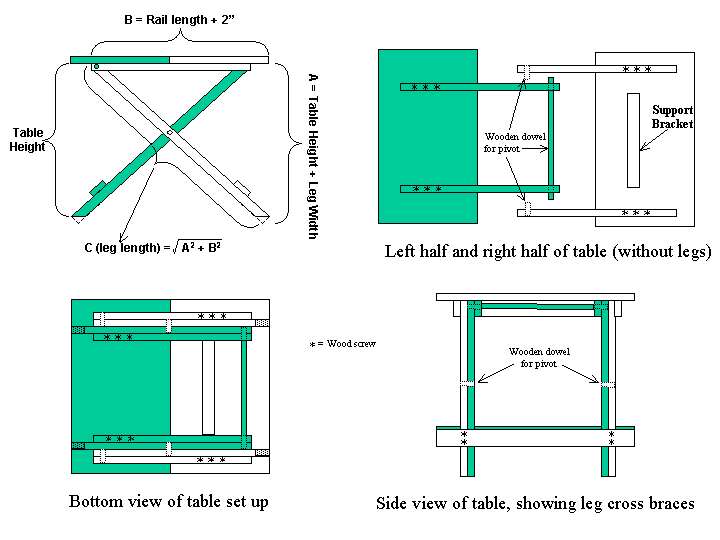
If you would rather download the PowerPoint 2000 (50kb) slide showing these drawings, click here.
Cut/plane/assemble the two halves of the top (in my case 12" x 24" x 3/4")
Cut the 4 support rails. The support rails should be long enough to be about 2 inches from the edge, so in my case they were 20" long x 1 1/2" wide x 3/4" thick.
Drill the pivot holes in the support rails. Each rail has only one pivot hole, which is in the end of the rail where it attaches to the leg (i.e. on the opposite end from the table half it is attached to).
Cut the legs long enough for the height you want. This is the tricky part, because the bottom edge of each leg is not square, but must be cut on an angle so the whole leg sits flat on the ground. Use the Pythagorean theorem to get an initial measurement, as you see the equation in the drawing.. Each leg makes a right triangle with the top. You know how high you want it, and you know the length of the support rail (+ 2" from the edge). I would add the width of the leg to the height of the table so you have a little extra to cut off when it is time to cut the angle so the leg sits flat. A = the table height + leg width. B=the support rail length + 2". The length of the leg is the square root of (A squared + B squared).
Lay the outer set of support rails down so they are 2" from the top and bottom edge, and 2" from the side edges. Now lay the legs down side by side on the inside of the outer rails. Lay the inner support rails down next to the legs so they are 2" from the side edges. Mark the locations of the support rails. The outer ones attach to one half of the table, and the inner ones attach to the other half of the table.
Lay the table out with the legs between the support rails, as in step 5. Cut, position, and attach the support bracket between the inner rails. The bracket attaches to the table half with the outer rails (as depicted in the drawing).
 Drill pivot holes in the top of each leg, and cut a small
angle off the inside top of each leg so the leg will pivot past the table
top, as shown in the drawing on the right.
Drill pivot holes in the top of each leg, and cut a small
angle off the inside top of each leg so the leg will pivot past the table
top, as shown in the drawing on the right.
Lay out the table, upside down, with dowels temporarily in the pivot holes. (You may need a friend to help with this part). Using measuring sticks, raise the legs (on one side) until the legs are the correct table height distance up from the edge of the table. Mark this spot on both legs and check it with a level. You can assist in the checking by clamping the legs together where they cross. Now using a pencil, mark the legs where they cross. Repeat for the other set of legs.
Remove the legs and drill the pivot holes in the center of where the legs cross.
Re-assemble the table, with dowels in all the pivot holes, and check one last time for errors. The table ought to fold up correctly at this point and stand up on its own. Dis-assemble the table and re-assemble it gluing the dowels into ONE side of each pivot point. Rub a bar of soap around the other end of each dowel so it will pivot smoothly.
Cut cross braces and glue/screw them on. I find it best if the cross braces are attached low enough so the table tops can fold down onto the legs without hitting the cross braces.